How to Remove Old Attic Insulation:
A Step-by-Step Guide
DIY Attic Insulation Removal
Attic insulation needs to be removed for various reasons, including pest infestations, deteriorating insulation, upgrading to a higher R-value, preparing for spray foam, or restoring your home after water damage. Whatever the reason, proper removal is essential for a clean and safe workspace.
While you can hire a professional insulation removal company, many homeowners choose the DIY route to save money. This guide will walk you through the process of safely removing attic insulation yourself.
Step 1: Determine the Size of Your Project
Before getting started, calculate the square footage of your attic. This will help you estimate the amount of insulation you need to remove and how many insulation removal bags you'll need.
How to Calculate Square Footage and Cubic Footage
- Measure the Square Footage:
- Measure the length and width of your attic.
- Multiply these two numbers to get the total square footage.
- Example: If your attic is 30 feet long and 20 feet wide, your total area is 600 square feet.
- Measure the Depth of Your Insulation to Get Cubic Footage:
- Use a ruler or measuring tape to determine the average depth (thickness) of your insulation in inches.
- Convert inches to feet (divide by 12).
- Multiply the square footage by the depth in feet to get the total cubic feet of insulation to be removed.
Example Calculation:
- If your attic is 600 square feet and the insulation is 5 inches deep:
- Convert 5 inches to feet: 5 ÷ 12 = 0.42 feet
- Multiply 600 sq. ft. x 0.42 ft = 252 cubic feet of insulation
This cubic footage helps determine how many insulation removal bags you'll need. Use our Insulation Bag Calculator for a more precise estimate.
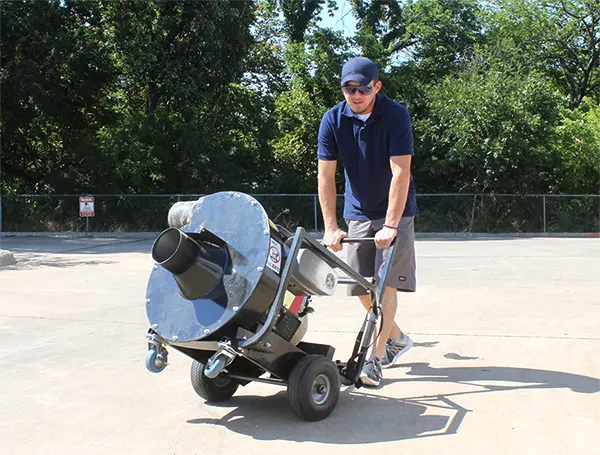
Step 2: Rent an Insulation Vacuum Machine
To efficiently remove blown-in insulation, you'll need an insulation vacuum machine. These can be rented from most equipment rental companies.
Pro Tip: Ask the rental company about the vacuum's capacity and power to ensure it's suitable for your job size.
Step 3: Estimate the Number of Removal Bags Needed
Once you know your attic's size, use our Insulation Bag Calculator to determine how many insulation vacuum bags you'll need. This helps prevent running out of bags mid-job.
Tough Bags' heavy-duty insulation vacuum bags are designed for large-scale debris collection, ensuring easy and efficient disposal.
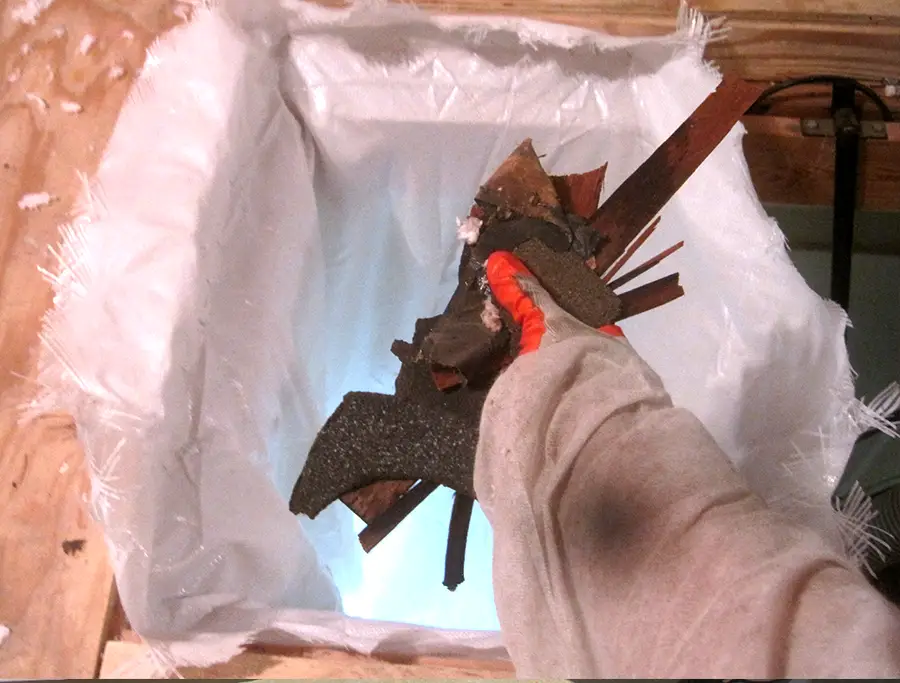
Step 4: Prepare the Work Area
Before you start removing insulation, take time to clear out any debris that could interfere with the process. This includes:
- Old roofing materials like shingles and nails
- Loose wood or drywall scraps
- Any remaining pest droppings or contaminants
Safety Tip: Wear protective gear, including gloves, safety glasses, and a respirator, to avoid exposure to dust, fiberglass, or contaminants.
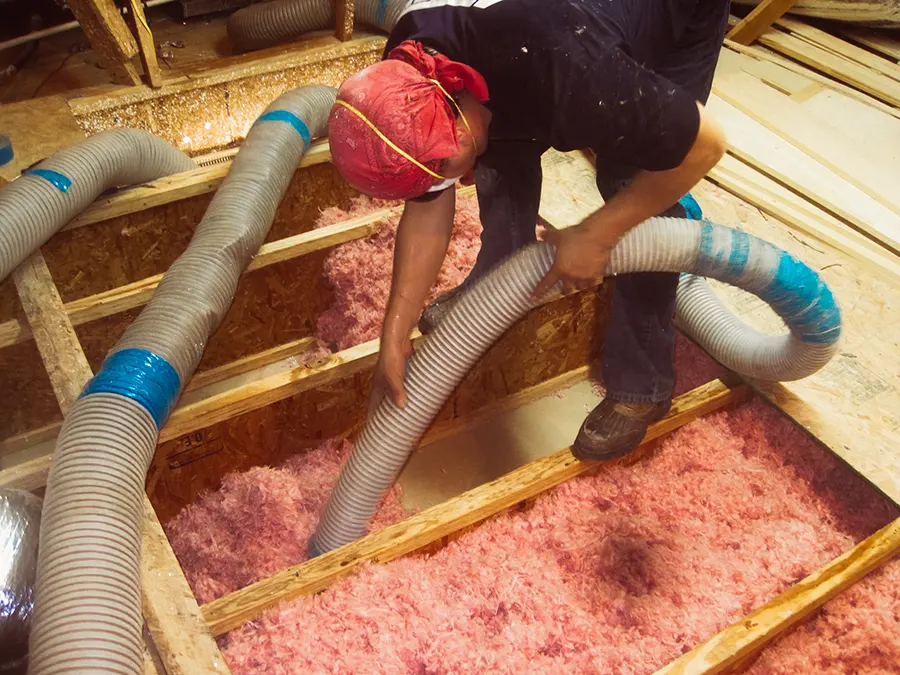
Step 5: Set Up Your Vacuum Machine Properly
Carefully position your insulation removal vacuum to maximize efficiency and safety. Keep these precautions in mind:
- Avoid placing the vacuum near doors, windows, or high-traffic areas where debris could be blown out.
- Be cautious of nails and sharp debris—these can be sucked into the vacuum and expelled at high speeds, causing bodily harm or property damage.
Once your equipment is set up, you're ready to start vacuuming out the old insulation.
Final Thoughts
Removing attic insulation yourself can be a cost-effective solution, but it requires proper planning, the right equipment, and safety precautions. By following these steps, you'll ensure a smoother, safer removal process.
Tough Bags Multipurpose removal bag guide.
We suggest attaching a short section of hose to your insulation removal machine for smoother bag filling, reducing the risk of blowouts and protecting the bag from debris. The how-to video below will guide you throug connecting the Tough Bags Multipurpose bag that has a wide opening.
Tough Bags Collar and Dust Guard Pro
Similar to the multipurpose bag, we recommend you you attach a section of hose to your machine. However, it is not necesary if you do not have the section of hose.
Both of these insulation removal bags feature an easy-connect collar for easy attachment to your removal machine. Just slide the bag collar onto the exit hose or machine, then secure it with tape or a hose clamp. It's a hassle-free setup!